
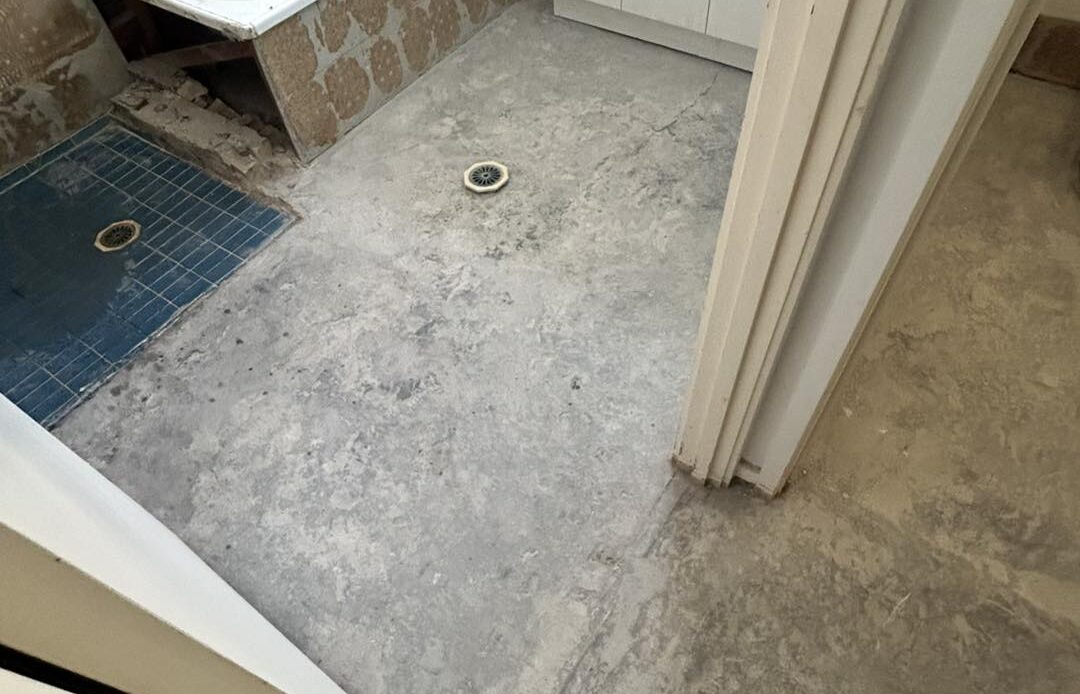
Understanding Why Subfloor Preparation Matters Before New Flooring
When planning a renovation, most homeowners focus on visible finishes such as tiles, timber planks, or hybrid flooring. What many overlook is the surface beneath those materials. Subfloor preparation is not a minor preliminary task. It is the structural foundation that determines whether your new flooring lasts five months or fifteen years.
A poorly prepared subfloor leads to cracked tiles, lifting boards, hollow sounds, moisture damage, and uneven surfaces. In many cases, the flooring product itself is blamed. The truth is simple. Flooring failures almost always trace back to preparation failures.
If you are investing in new flooring, understanding the most common subfloor preparation mistakes can save you thousands in repairs and replacements.
What Is Subfloor Preparation?
Subfloor preparation is the process of inspecting, cleaning, repairing, levelling, and moisture testing the base surface before installing new flooring. Depending on your home, this base may be:
- Concrete slab
- Timber substrate
- Existing screed
- Particleboard or plywood
- Previously tiled surfaces
Each type requires a specific preparation approach. Skipping steps or rushing the process is where costly mistakes begin.
10 Costly Subfloor Mistakes You Will Regret Ignoring
1. Failing to Inspect the Existing Subfloor Properly
The first mistake happens before any grinding or levelling begins.
Many homeowners assume the existing surface is good enough if it looks relatively flat. However, small cracks, hidden moisture, weak spots, or previous adhesive residue can compromise the entire installation.
A proper inspection should check for:
- Structural cracks
- Movement in timber floors
- Moisture levels
- Adhesive contamination
- Uneven height variations
Skipping this stage often results in issues appearing weeks or months after installation.
2. Ignoring Moisture Testing
Moisture is one of the biggest threats to flooring longevity, particularly for timber, hybrid, laminate, and vinyl planks.
Concrete slabs may appear dry but still contain high moisture levels.g
Without proper testing, trapped moisture can cause:
- Adhesive failure
- Warping boards
- Mould growth
- Bubbling under vinyl
- Efflorescence in tiled areas
According to the YourHome, condensation and moisture in buildings can lead to mould, rot, and deterioration of building materials if not properly managed. This highlights why moisture testing is a critical step before installing any new flooring.
3. Not Removing Old Adhesives and Contaminants
Many renovation projects involve replacing old flooring. Beneath that surface, you may find:
- Tile glue
- Carpet adhesive
- Paint
- Epoxy coatings
- Waterproofing residue
Leaving these contaminants in place weakens bonding. New adhesives require a clean, solid, porous surface to adhere correctly.
Mechanical grinding is often necessary to remove residue and create a clean bonding profile. Simply scraping or sweeping is rarely sufficient.
4. Skipping Mechanical Grinding
Grinding is one of the most important steps in concrete subfloor preparation.
It achieves two key outcomes:
- Removes surface contaminants
- Opens the concrete pores for proper adhesive bonding
Without grinding, adhesives may sit on a smooth surface and fail to bond securely. This often results in hollow sounding tiles or lifting planks.
Dust controlled grinding systems are recommended to ensure clean results without contaminating surrounding areas.
5. Ignoring Floor Level Tolerances
Every flooring product has manufacturer tolerances for flatness and level.
For example:
- Large format tiles require extremely flat surfaces
- Hybrid planks need tight height tolerances
- Timber boards are sensitive to uneven dips
If the floor exceeds these tolerances, the following issues may occur:
- Lippage between tiles
- Gaps in planks
- Movement underfoot
- Uneven finishes
Using a straight edge to measure high and low points helps determine whether levelling compounds are required.
6. Applying Levelling Compound Incorrectly
Levelling compound is not a shortcut fix. When applied incorrectly, it can cause more harm than good.
Common mistakes include:
- Pouring without priming
- Applying too thinly
- Not mixing properly
- Failing to respect curing times
- Ignoring temperature conditions
Levelling compounds require correct preparation and environmental conditions to perform properly. Rushing this stage leads to cracking or bonding failure.
7. Overlooking Structural Movement
Timber subfloors are particularly vulnerable to movement.
Before installing tiles or rigid flooring over timber, you must:
- Check for loose boards
- Secure squeaky sections
- Reinforce weak areas
- Install appropriate underlay
Failing to stabilise movement leads to cracked grout lines, shifting planks, and tile breakage.
Concrete slabs may also experience movement due to settlement. Ignoring expansion joints can create long term damage.
8. Ignoring Manufacturer Specifications
Each flooring product comes with detailed installation guidelines. These specifications include:
- Moisture limits
- Surface flatness requirements
- Approved primers
- Compatible adhesives
- Expansion allowances
Skipping or ignoring these specifications may void product warranties.
Professional subfloor preparation always aligns with manufacturer guidelines to ensure compliance and longevity.
9. Rushing the Drying and Curing Process
Time pressure is a common cause of flooring failure.
After grinding, patching, or levelling, surfaces must:
- Cure properly
- Reach moisture equilibrium
- Stabilise before installation
Installing flooring too soon traps moisture and weakens bonds. Even one day too early can reduce lifespan significantly.
Patience during preparation protects your long term investment.
10. Choosing the Cheapest Preparation Option
Cost cutting in preparation almost always costs more later.
Some contractors skip:
- Moisture testing
- Grinding
- Proper levelling
- Primer application
The result may look fine initially. However, failures usually appear within the first year.
Repairing failed flooring often requires:
- Removing tiles or planks
- Re preparing the surface
- Purchasing new materials
- Paying for reinstallation
Spending properly on subfloor preparation is far cheaper than replacing an entire floor.
Step by Step Guide to Proper Subfloor Preparation
If you want to avoid the mistakes above, follow this structured process.
Step 1: Full Inspection
Assess the condition of the substrate. Look for cracks, movement, moisture, contamination, and uneven surfaces.
Step 2: Moisture Testing
Conduct moisture testing appropriate to the subfloor type. Ensure levels are within manufacturer tolerance before proceeding.
Step 3: Remove Existing Floor Coverings
Completely remove old tiles, carpet, timber, adhesives, and coatings.
Step 4: Mechanical Grinding or Sanding
Grind concrete to remove residue and create a clean bonding profile. Sand timber floors to eliminate contaminants.
Step 5: Structural Repairs
Fill cracks, secure loose boards, patch holes, and stabilise weak areas.
Step 6: Prime the Surface
Apply primer suitable for the chosen levelling compound or adhesive system.
Step 7: Apply Levelling Compound
Level low areas to meet flatness tolerances. Allow sufficient curing time.
Step 8: Re Test Moisture if Required
Ensure moisture remains within acceptable levels before installation.
Step 9: Final Clean
Remove dust and debris thoroughly before flooring installation begins.
Step 10: Install Flooring According to Manufacturer Guidelines
Follow specified adhesives, expansion gaps, and environmental requirements.
Why Professional Subfloor Preparation Is Worth It
Homeowners planning renovations often underestimate the technical skill required for correct preparation.
Professional teams use:
- Industrial grinding equipment
- Dust control systems
- Moisture meters
- Laser levelling tools
- Manufacturer approved materials
The difference between DIY preparation and professional subfloor preparation is not cosmetic. It is structural.
When flooring fails, it is rarely because the tiles or planks were defective. It is because the base was not prepared correctly.
The Long Term Cost of Getting It Wrong
Ignoring proper preparation can lead to:
- Cracked tiles
- Peaking hybrid floors
- Cupped timber
- Lifting vinyl
- Waterproofing failure
- Mould issues
In wet areas such as bathrooms and laundries, poor preparation can even compromise waterproof membranes, creating hidden water damage behind walls and under floors.
Repairing structural water damage is significantly more expensive than doing preparation correctly the first time.
Prepare Your Subfloor Properly Before Installing New Flooring
New flooring is an investment in your home’s comfort, appearance, and value. But the visible surface only performs as well as the foundation beneath it.
Subfloor preparation is not an optional extra. It is the most critical stage of the entire flooring process.
Before installing tiles, timber, hybrid, or vinyl, ensure your subfloor is clean, dry, flat, structurally sound, and within manufacturer tolerances.
If you are planning a renovation, we are here to help. At Total Floor Prep Solutions , we specialise in professional subfloor preparation that protects your flooring investment from the ground up. We take the time to inspect, test, grind, level, and prepare your subfloor properly so your new flooring performs exactly as it should.
Contact us at Total Floor Prep Solutions today to discuss your project. We are ready to help you avoid costly subfloor mistakes and get your renovation done right the first time.