
Underfloor heating can transform a bathroom from a cold, practical space into one that feels warm, comfortable, and well-designed. For self-build homeowners, it is one of those upgrades that makes everyday living feel noticeably better.
But the success of an underfloor heating system does not start with the heating mat, cable, pipework, tile, or thermostat. It starts with the surface underneath.
Good bathroom subfloor preparation is one of the most important parts of installing underfloor heating. If the subfloor is uneven, damp, weak, dusty, or poorly insulated, the heating system may not perform as efficiently as it should. It can also increase the risk of cracked tiles, loose adhesive, failed grout, heat loss, and costly repairs later.
A warm bathroom floor needs more than heating. It needs the right foundation.
Why Bathroom Subfloor Preparation Matters
Bathrooms are demanding spaces. They deal with moisture, temperature changes, foot traffic, waterproofing requirements, and often heavy finishes such as ceramic, porcelain, or natural stone tiles.
When underfloor heating is added, the subfloor plays an even bigger role. It must support the finished floor, help the heating system work efficiently, and provide a stable base that can handle temperature changes.
Poor subfloor preparation can lead to:
- Uneven heat distribution
- Tile movement or cracking
- Poor adhesive bonding
- Grout failure
- Heat loss into the floor below
- Moisture-related damage
- A floor finish that feels uneven underfoot
For self-build homeowners, this is where careful planning pays off. The better the subfloor is prepared, the better the underfloor heating system can perform.
Start with a Strong and Stable Subfloor
Before installing underfloor heating in a bathroom, check that the subfloor is structurally sound.
Whether the base is concrete, timber, screed, or a suitable tile backer board system, it needs to be firm, stable, and capable of supporting the full flooring build-up. This includes the heating system, levelling compound, adhesive, tiles, grout, and any waterproofing layers.
Walk across the floor and check for movement. Look for soft spots, bounce, cracks, loose boards, damaged areas, or signs of water damage. Any weakness should be addressed before the heating system is installed.
Underfloor heating should never be used to hide problems in the subfloor. It should be installed over a surface that is already ready to support the final bathroom floor.
Check for Moisture Before Moving Forward
Moisture is one of the biggest risks in bathroom flooring projects.
A bathroom subfloor must be dry before underfloor heating is installed. If moisture is trapped beneath the heating system or floor finish, it can affect adhesives, levelling compounds, waterproofing products, and the long-term stability of the floor.
Concrete and screed floors should be given enough time to cure and dry properly. Timber floors should be checked for swelling, staining, rot, or softness. Any signs of leaks or damp should be investigated before the installation continues.
Warning signs can include musty smells, dark patches, peeling coatings, soft timber, or white powdery marks on concrete.
In a self-build project, it is tempting to move quickly from one trade to the next. But when it comes to heated bathroom floors, moisture needs to be dealt with properly before anything is covered up.
Make the Surface Flat and Even
Underfloor heating systems require a smooth, even base.
If the subfloor has dips, ridges, high spots, or uneven patches, the heating system may not sit correctly. This can make installation harder and may affect the final tile finish. Uneven areas can also create poor adhesive coverage, lipped tile edges, and weak points in the floor.
Use a long straightedge or level to check the surface. Mark any high and low areas before deciding on the right repair method.
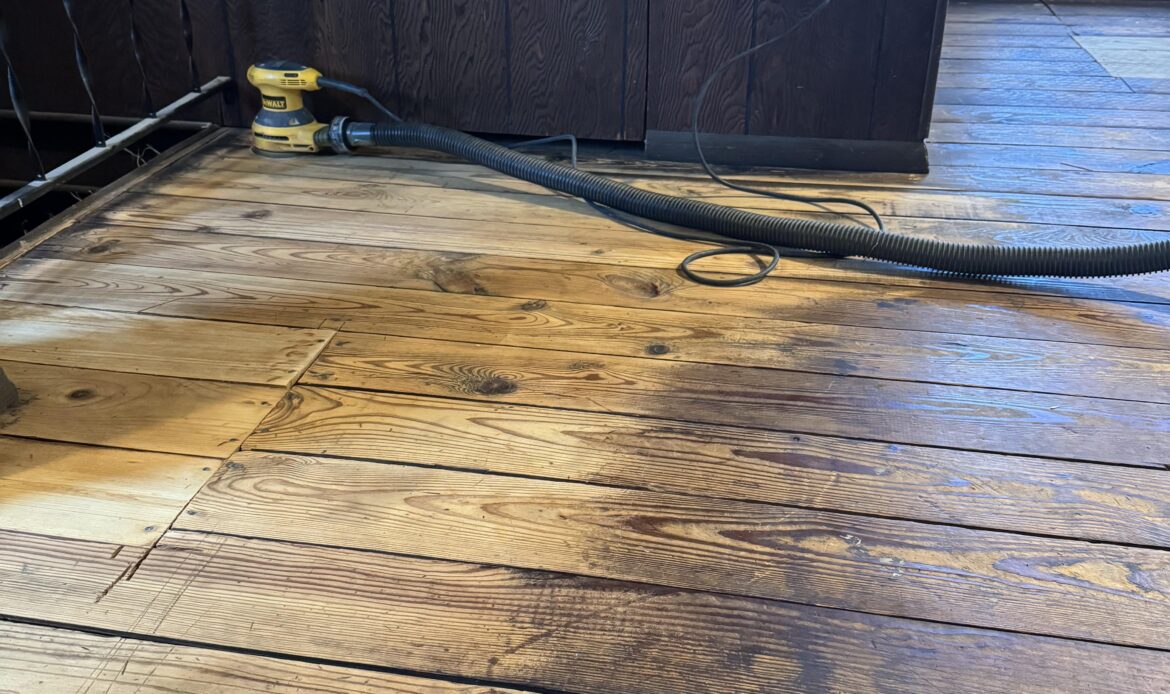
High spots may need grinding or sanding. Low spots may need a suitable patching compound or self-leveling compound. The exact product will depend on the subfloor type, heating system, and final floor covering.
Flatness is especially important when using large-format bathroom tiles, as they are less forgiving over uneven surfaces
.
Clean the Subfloor Thoroughly
A clean subfloor is essential for good bonding.
Dust, plaster, grease, paint, sealers, old adhesive, and building debris can all interfere with primers, levelling compounds, tile adhesives, and waterproofing systems. Even small amounts of residue can cause problems if they sit between layers that need to bond.
Before moving on, sweep and vacuum the floor thoroughly. Remove loose material and clean any contaminated areas using products suitable for the surface. Allow the subfloor to dry fully before applying primer, levelling compound, waterproofing, or heating components.
Clean preparation may feel basic, but it is one of the simplest ways to reduce the risk of installation failure.
Think About Insulation Before Heating
For underfloor heating to work efficiently, the heat needs to travel upward into the bathroom rather than downward into the structure below.
This is where insulation becomes important. Depending on the system and subfloor, insulation boards may be recommended beneath electric underfloor heating. In some builds, insulation may already be included within the floor build-up. In others, it needs to be added before the heating system is installed.
Good insulation can help improve heat-up times, reduce wasted energy, and make the bathroom feel more comfortable.
Self-build homeowners should check the heating manufacturer’s guidance and the wider floor specification before installation. The correct insulation approach will depend on the type of underfloor heating, the subfloor, the bathroom design, and the final floor finish.
Use the Right Primer and Levelling Products
Primers are often overlooked, but they play an important role in preparing bathroom subfloors.
The right primer can help control surface absorbency, improve bonding, and prepare the subfloor for levelling compound, adhesive, or waterproofing. Some self-leveling compounds require a specific primer before application. Some subfloors may also need special treatment before heating systems are installed.
Always use products that are compatible with the full flooring system. This includes the subfloor, insulation board, heating mat or pipework, levelling compound, waterproofing membrane, tile adhesive, and tile finish.
Mixing incompatible products can lead to weak bonding or product failure. Following one manufacturer’s system, where appropriate, can help reduce uncertainty.
Protect the Heating System with the Right Covering Layer
Underfloor heating usually needs to be covered or embedded before tiling.
For electric heating mats or cables, this often involves using a suitable flexible self-levelling compound or adhesive bed, depending on the system. For water-based underfloor heating, the pipes are typically set within a screed or suitable floor build-up.
This covering layer helps protect the heating system and creates a smooth surface for the final floor finish. It also helps distribute heat more evenly across the bathroom floor.
The depth, product type, and drying time must follow the heating and flooring manufacturer’s instructions. Turning the heating on too soon can damage the installation, so the correct curing time is important.
Do Not Forget Waterproofing
In bathrooms, waterproofing is not optional in areas exposed to water.
Tiles and grout can resist water, but they are not a complete waterproofing system on their own. Wet zones, wall-floor junctions, corners, pipe penetrations, shower areas, and drainage points all need careful attention.
Waterproofing should be planned as part of the full bathroom floor build-up. It needs to be compatible with the subfloor, heating system, levelling layer, adhesive, and tile finish.
For self-build homeowners, this is an area where professional advice can be valuable. A heated bathroom floor is a long-term investment, and waterproofing helps protect both the finish and the structure beneath it.
Choose a Compatible Tile Adhesive
The adhesive used over underfloor heating must be suitable for heated floors.
Temperature changes can cause small movements within the flooring system. A flexible, compatible tile adhesive is usually required, especially when installing porcelain or large-format tiles.
The adhesive should match the tile type, subfloor, heating system, waterproofing layer, and bathroom conditions. Porcelain tiles, for example, are dense and often need a polymer-modified adhesive with strong bonding performance.
Using the wrong adhesive can reduce the floor’s durability, even if every other part of the preparation has been done well.
Plan the Full Floor Build-Up Early
One of the most important things self-build homeowners can do is plan the entire bathroom floor build-up before installation begins.
This means understanding the combined height of each layer, including:
- Subfloor
- Insulation board
- Primer
- Heating system
- Levelling compound or screed
- Waterproofing
- Tile adhesive
- Tiles
- Grout and trims
This matters because floor height affects door clearances, thresholds, drainage falls, shower screens, vanity units, and transitions into nearby rooms.
The National Construction Code states that where a floor waste is installed in a wet area, the minimum continuous fall of a floor plane to the waste must be 1:80, and the maximum continuous fall must be 1:50. For heated bathroom floors, this shows why the full build-up needs to be planned before installation, so heating, levelling, waterproofing, tiles, and drainage all work together.
Planning early also helps prevent last-minute compromises. A well-designed heated bathroom floor should feel integrated into the build, not added as an afterthought.
Common Subfloor Preparation Mistakes to Avoid
Many underfloor heating problems start before the system is even switched on.
Avoid these common mistakes:
- Installing heating over a damp subfloor
- Skipping structural repairs
- Ignoring uneven areas
- Forgetting insulation where it is needed
- Using incompatible primers or levelling compounds
- Failing to waterproof bathroom wet zones properly
- Using standard adhesive where flexible adhesive is required
- Turning the heating on before the products have cured
- Not checking the final floor height
- Rushing the preparation stage
Each of these mistakes can affect performance, comfort, and durability.
Bathroom Subfloor Preparation Checklist
Before installing underfloor heating, your bathroom subfloor should be clean, dry, flat, stable, structurally sound, free from loose material, properly primed, insulated where required, waterproofed in wet areas, and compatible with the chosen heating system and floor finish.
You should also confirm that the full floor build-up works with door heights, drainage, thresholds, and the wider bathroom design.
This checklist is simple, but it can prevent many of the issues that cause heated floors to underperform.
When to Bring in a Professional
Some self-build homeowners are confident in managing floor preparation themselves. Others may benefit from professional input, especially when working with wet rooms, large-format tiles, timber subfloors, structural movement, new screeds, or complex underfloor heating systems.
Professional help is worth considering if the subfloor has major cracks, the bathroom requires detailed waterproofing, the floor feels unstable, the moisture level is uncertain, or the heating system needs a specialist installation method.
Good advice at the preparation stage can save time, money, and disruption later.
Bathroom Subfloor Preparation for Underfloor Heating
Underfloor heating can make a bathroom feel more comfortable, more considered, and more enjoyable to use every day. But the heating system is only as good as the surface beneath it.
Careful bathroom subfloor preparation provides the system with a solid foundation. It helps the floor heat evenly, supports the tile finish, reduces the risk of cracking, and protects the bathroom from moisture-related problems.
For self-build homeowners, the crucial step is not simply choosing the right heating product. It is preparing the subfloor properly before the system goes in.
Get the base right, and your heated bathroom floor has a much better chance of feeling warm, looking professional, and lasting for years.
If you need help preparing your bathroom subfloor before underfloor heating is installed, Total Floor Prep Solutions can assess the surface, identify preparation issues, and recommend the right approach. Contact us to discuss your project before the heating system and tiles go down.